Using the WRMK Planner Punch Board to replace pages in a disk system notebook. @WeRMemoryKeepers
I bought the We Are Memory Keepers Planner Punch Board for a very specific purpose. I wanted to replace some pages from a notebook I bought at the Dollar Tree. I didn’t like the green paper it came with and I wanted to replace the pages with white paper. I like the disk system, however; I don’t use a paper planner and I am not a person who uses journals so I didn’t have a lot of need for punching for a disk system until now.
I found the Punch Board at Tuesday Morning at a discounted price so I went ahead and purchased it.
Opening the box, the board comes with a few different punches. The three colors of the punches don’t really coordinate styles as you will see in the video below.
My pages are replaced and I am much happier with the white pages versus the green.
Make a pair of silver and gold earrings using materials from The Maker’s Movement. #sponsored @jointhemakersmovement
with The Makers Movement
I really enjoy making earrings. Some of the easiest earrings to make use a die to cut the shape. The silver and gold earrings above are made using a die and other materials from The Maker’s Movement. I like the combination of silver and gold especially when you can’t decide which color of metal works with your outfit the best. Or if you are going to wear different metals for other jewelry pieces, these earrings can pull it all together.
A special thanks to The Maker’s Movement for providing materials to use in this post.
Did you know you can paint with Distress Oxide ink pads? #affiliate #experimentalpainting
Distress Oxide ink pads create a very unique look, but did you know you can also paint with them? Just by adding water, you get a fun watercolor look. The colors mix easily but when you put them on top of each other they not only knock each other out but they blend and feed or spread. It is a very different effect. Light colors on top of dark colors actually show up and knock out the dark color while they blend together around the edges. The colors don’t get muddy when added together. You really need to see it to understand the reactions. The video below will show the reactions.
You can find Distress Oxide inks on Amazon (affiliate link) [Distress Oxide]
Make a mini mica card using up materials you have on hand.
I like making cards that are alternative sizes. This is a good technique for using up scraps and materials you already have on hand. I am using a lot of materials to make this simple card but you don’t have to have them all to make a similar card. Follow along with the video tutorial to see how this simple card is done.
Materials:
cardstock
stamp
stamp block
Versamark ink pad
Mica power
Label maker
alcohol ink marker
Washi chomper
Glue Dots
Video Tutorial:
Here is a close-up of the finished mini card. The mica powder really shines in person. I like how the colors are enhanced by the black cardstock.
Let me know what you make cards in a variety of different sizes. I think mini or small are my favorite.
Suggested Material Links:
Links are Affiliates AZ – Amazon, SSS – Simon Says Stamps, SB – Scrapbook
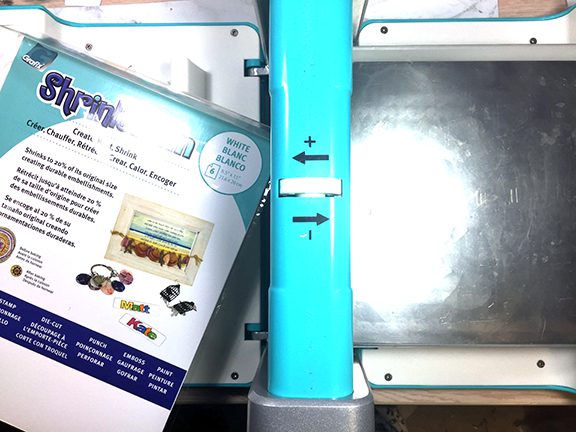
Can you stamp with a die? Check out how I made a shrink art keychain.
Maker’s Movement sent me the Nesting Doll die set. I decided I wanted to try something a little different with the dies. I wondered, can you actually stamp with a die? The answer is yes, well, kind of. Doing so leaves a light image but it is enough to work with and I make this sweet keychain using the technique.
Thank you to Maker’s Movement and Grafix for providing materials that are used in this project.
CrossOver II and Graphix shrink film
Materials:
CrossOver II
Nesting Doll Die Set
Grafix shrink film in white
Alcohol ink markers
Paint markers
Black thin line marker
stamp pad
washi tape
keychain element
jump ring
2 jewelry pliers
UV Resin
UV light
toaster oven
Directions:
Nesting Doll Die Set
To begin, I clipped the pieces of the die apart that I needed to work with. Then I cut out the doll shape from the Grafix shrink film.
Video Tutorial:
Look at the difference in size from the die (the original size) to the shrink film after baking. Not only did the size change but the colors got more intense.
Suggested Materials:
Links are Affiliates AZ – Amazon, SSS – Simon Says Stamps, SB – Scrapbook
Make a necklace from Shrink Film. #sponsored @graphixarts
I was sent a sample of Shrink Film from Grafix. I was so excited to see the film in silver and gold. I wasn’t aware of the color options. The gold was such a nice color for jewelry making. The technique I used was so simple and easy to do and the result is one of my favorite pieces.
materials
Materials:
Shrink Film – gold
StazOn black ink
stamp
hole punch
corner rounder
scissors or paper trimmer
toaster oven or heat source
UV resin (optional)
UV light (optional)
jewelry making materials
beads
cord
Video Instruction:
finished
To finish it off I used a black spacer bead and a gold crystal. Gold wire was used to join the pieces together and it hangs from an adjustable waxed cord in black.
Learn how to make faux stained glass using panels from Denise Boddey Designs. @deniseboddeydesigns #sponsored
Looking at these Sprouts Panels from Denise Boddey Designs, I thought they would work well sandwiched together. Then I needed to decide what to put between them. Could I make faux stained glass with alcohol ink? Why not give it a try!
Special thanks to Denise Boddey Designs and ScraPerfect for providing some of the materials that are used in this project. I am a design team member with both companies.
Using a laminator and a laminate sheet, send it through by its self. Then set it aside. This is the plastic sheet that will be used as faux stained glass.
Video Tutorial:
Here is a close-up of the finished project. I love how the colors blend together and show through the chipboard piece. Because the chipboard is laser cut, they align perfectly.
The whole finished piece with light shining through. I can’t wait to hang this in a window. I think it turned out so nice.
Suggested Products:
Links are Affiliates AZ – Amazon, SSS – Simon Says Stamps, O – Other
Learn how simple it is to sew a bowl cozy with help from a Cricut Maker.
I have seen bowl cozies offered at craft fairs, they intrigued me but I always passed them by. Recently watching a YouTube video making them, I became interested in making my own. Watching someone use a bowl cozy, now it made sense to me. We tend to use a pot holder, which works, but it doesn’t wrap around the sides of the bowl to protect your hands. So, I decided to make my own with the help of my Cricut Maker.
Some items used in this post were provided by Cricut.
Cricut Maker
Materials:
cotton fabric
cotton batting (or cotton felt)
thread
sewing machine
scissors
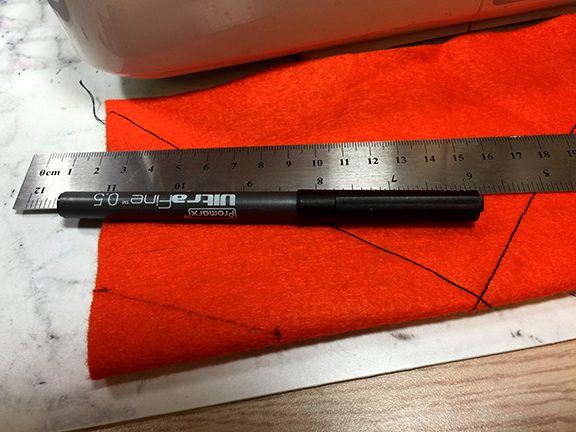
pen
ruler
Cricut Maker
Directions:
Cut your fabric and felt to 9″ squares, two of each. I used my Cricut Maker to cut the cotton fabric, it was so easy, and made the squares the exact same size.
Place the batting or felt to the wrong side of the fabric. Sew diagonally across the pieces making an X shape.
Do this to both pieces. The color of the felt or batting doesn’t matter because it will be inside the cozy.
Fold one side of the fabric in half with the right side together. Measure and mark a point along the fold 2″ and up the short side 1″. Draw a diagonal line connecting these points together. Do this to both side.
From here it is easier to explain the steps in a video.
Video Tutorial:
The finished bowl cozy with a bowl in place. This is going to be so handy. I think I am going to need to make a few more!
The sewing machine I am using is a Brother SE-350 Sewing & Embroidery Machine, it is discontinued but there are similar machines available.
Suggested Materials:
Links are Affiliates AZ – Amazon, C – Cricut, O – Other
Follow along with my as I design a plaque inspired by a mood board.
This month as part of the Denise Boddey design team we were challenged to work with a mood board. I have seen mood boards before but I have never worked using one as inspiration for a design.
mood board
The above mood board is what we were provided, aren’t the colors beautiful! You can see that I worked more with the three colors on the left side, the second image down from the top. These were colors of items I already had on hand.
To begin I used my Cricut Maker to cut out the word hello three times from blue cardstock. The reason for three times was to add some height to the word when placed on the plaque. Once cut out, I glued the three layers together.
Video Tutorial:
Suggested Materials:
Links are Affiliates AZ – Amazon, SSS – Simon Says Stamps, SB – Scrapbook, O – Other
Scraperfect Embellie Gellie Tool Shop at: AZ | SSS
I have a post up on ScraPerfect today for making a quick and easy card.
I began this card with a gelli print I was playing around with and decided to stamp onto it. Which then turned into making a card. Sometimes that’s how things happen, with the end not in sight. Using ScraPerfect products make this card making so quick and easy. See my post on the ScraPerfect blog where I post tutorials twice a month as a part of their design team. [card making on ScraPerfect]
Suggested Materials:
Links are Affiliates AZ – Amazon, SSS – Simon Says Stamps