This is the first ornament offered in the Ornament Advent. You can purchase the entire advent consisting of 12 SVG files, instructions, and video tutorials for $7.50. Or purchase the single ornament file for $2.00
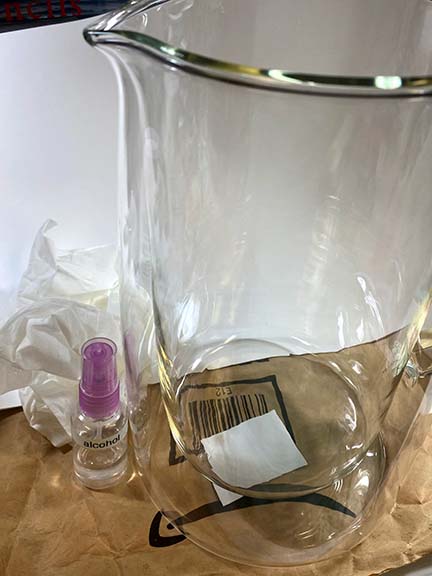
When I saw this glass pitcher at Aldi’s I thought it would look lovely with a band of different etched leaves around the bottom. So I bought it and proceeded to etch the pitcher.
I cut out a variety of different leaf silhouettes and weeded away the leaves. If you would like this SVG file, it is available for free in my store here: [leaves]
The next step was to prepare the leaf silhouettes with transfer tape.
I removed the labels from the pitcher and cleaned the surface with rubbing alcohol before placing the leaves around the bottom of the pitcher.
etchall creme was applied to the vinyl leaf design and I waited 15 minutes for the glass to etch.
After cleaning off the etching creme and removing the vinyl, the glass wasn’t etched. I have never had this happen before so I looked into it further.
Different kinds of glass don’t etch or don’t etch well. This can happen with cremes and sandblasting.
Borosilicate Cremes will not work on all types of borosilicate glass. Borosilicate glass is a highly durable glass material made from silica sands and boron trioxide used to withstand incredibly high temperatures.
Tempered Glass The only type of glass that should not be etched is tempered glass. Tempered glass has been heat-treated in a way that creates great tension within.
Pyrex I’ve heard that older Pyrex casserole dishes, like those made before 1998 are harder to etch or don’t etch. But most of the Pyrex casserole dishes sold in the U.S. since then etch just as well as any other sort of glass.
Vintage Glass I have also heard that vintage glassware doesn’t etch with creme.
So what do you do? Do the “toothpick ” test on items. This would have saved me a lot of time and process. From now on, before moving forward, I will always test my glass pieces by applying a small dab of etching creme onto the bottom of the glass piece to see if it will etch. My lesson was learned, and I hope this post saves you some time as well.
This week’s tag uses items from my stash, embossing, and a DIY liquid resist piece. (video tutorial here: DIY liquid resist) The elements are random but are related by the color green. The pocket contains a small card for journaling or writing a special note.
I think I am addicted to making ephemera paper clips. It is so much fun using up scraps and pieces and combining them into a pleasant image. They are miniature works of art.
There are no rules to making ephemera paper clips and if you do a Google search you will find a variety of examples. The only things you must use are a paper clip and some kind of adhesive. After that, you can collect whatever is around you. I tend to collect pieces that relate to each other by color.
Video Tutorial:
The first two I made were based on a journal I made in a past tutorial. I used leftover pieces of painted paper that were used for the cover of the book and coordinated additional pieces.
As I said, these were so fun to make. It has inspired me to do a series of miniature art pieces.
This week’s tag is working with a background we made last week for Tag it Tuesday. I wasn’t happy with the blotchy inked surface so this week we are altering it into a beautifully useful tag.
The materials I am using are the inked paper from last week. (See how blotchy it looks.) A black ink pad from Simon Says Stamp and a floral embossing folder. This is a great technique to use those papers and creations you don’t think you can create with.
Video Tutorial:
If you are interested in how the inked surface was made last week, here is the link to that tutorial post. [Mini Tags]
In this close-up image, you can see how the black in is added around the edges and possibly you can see the embossing on the paper surface. I really like how this technique transformed the inked surface into something I like much better.
The papercraft pocket and cards with a female theme are a delightful and creative way to express femininity and celebrate women. The pocket has a rather dark theme. It provides a convenient and stylish storage solution for the accompanying cards. The cards themselves feature beautiful illustrations and intricate details that capture the essence of otherworldly femininity, showcasing themes such as empowerment, beauty, and strength. Whether it’s for card making, glue books, scrapbooking, junk journals, or simply to show appreciation, this paper-crafted pocket and cards set is a perfect choice to convey heartfelt messages and make a lasting impression.
The zipped download file contains the page above with the pocket and cards as well as a ledger page to add to the back of the cards for journaling.
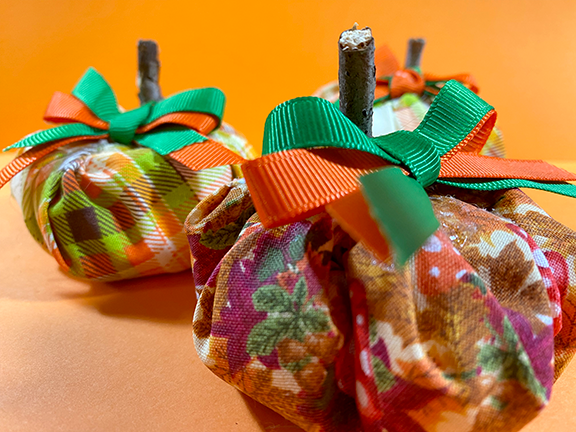
Similar to the toilet paper roll pumpkins but so much cuter because they are miniature in size. I don’t know about you but I love almost anything in miniature. These cute little pumpkins are great for fall decor. Make a few for a grouping arrangement or add one to an existing arrangement.
The links provided are for your use and may contain affiliate links. They cost nothing for you to use. Thank you in advance for supporting this site with its use.
I really like how the ribbon bows finish off the pumpkins and coordinate with the colors of the fabric. Watch the video above for tips on how to tie them.
With a free paper printable and your creativity, you can make a mini paper folio. #papercraft
Using a free printable of pink cards (or any card printable) create a charming and functional paper folio. These little folios can be used for jotting down notes to preserve memories. Include it in your scrapbooking, junk journals, glue books, or even as a special gift for your paper crafting friends.
The free printable can be found here: [Pink Cards]
You can etch glass at home with etchall creme. See how easy it can be with simple materials and tools. @etchallcreme
with etchall creme
Etch a colorful candy dish with etchall creme is quick and easy. No need for a cutting machine, just a paper punch in your desired shape. I am using a circle punch with vinyl scraps and finishing it off with buffing wax.
The links provided are for your use and may contain affiliate links. They cost nothing for you to use. Thank you in advance for supporting this site with its use.
Before starting any etching project, you will want to clean the glass surface you will be etching. I am using 91% Isopropyl Alcohol.
This is a great project to use up your smaller pieces of vinyl. I used a paper punch to create the circle templates that I intend to etch onto the glass dish. Don’t forget to save those punched circles for another craft project!
Apply the vinyl to the glass dish just like you would a sticker, no transfer tape is needed. Fill in any gaps that might get etching creme on them with additional vinyl. Apply the etching creme to the circles and set a time for 15 minutes.
I like to set my timer for 7 minutes and then move the etching creme around to make sure all the surfaces are covered and then set the timer for an additional 7 minutes
To wrap up, remove the excess creme from your project and return it to the container. etchall etching creme is reusable.
Wash the glass in running water, and remove the vinyl.
• I use a baby wipe and then rubbing alcohol instead of running water.
How to update vintage glassware with etchall etching creme. @etchallcreme #affiliate
with etchall creme
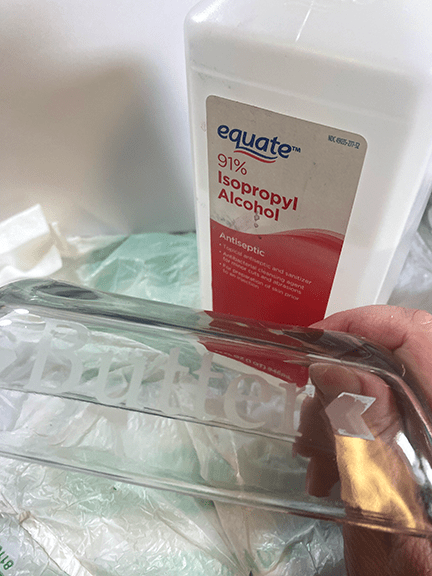
I found this vintage butter dish at our local thrift store. We keep our butter out on our kitchen counter, which keeps the butter always soft and ready to use. I chose to update the butter dish by etching the word “butter” on the side of the cover. It was really easy to do with etchall etching creme.
The links provided are for your use and may contain affiliate links. They cost nothing for you to use. Thank you in advance for supporting this site with its use.
I measured the side of the dish so that my design would fit well in the space. The top was rounded and too small to carry the wording. I marked the center of the dish with a permanent marker after I cleaned the glass with rubbing alcohol.
Designing the text and graphic first in Adobe Illustrator, I then sent the SVG file to Cricut Design Space and cut the vinyl on a Cricut Joy.
Here you can see the vinyl on a transfer sheet with the letters and design weeded away. I folded the design down the middle so that it could be aligned easily with the marks I made on the glass dish.
After placing the vinyl on the glass butter dish and making sure it was rubbed down well, I applied the etchall creme. Setting a timer for 7 minutes, I then moved the creme around and set the timer again for 7 minutes. This allows me to make sure I have covered all the areas. The total etching time is 15 minutes.
The final step is to clean the piece under running water and remove the vinyl. Doing this process a bit differently, I remove the creme and place it back into the container because the etching creme is reusable. Then I clean off the piece with a baby wipe. After removing the vinyl I clean the glass with rubbing alcohol, and then I buff the design with a clean cloth.