


With Easter right around the corner, I chose to turn a cute little flower pot into a Bunny Rabbit. The steps were easy and very doable for children. But I think parents would need to help with the hot glue. While my design is minimal, you could definitely add to the bunny with whiskers, ribbon, flowers, and more.

Materials:
- small terracotta pot
- cotton pom pom (or cotton ball)
- pink craft foam
- white cardstock
- googly eyes
- white paint
- paint brush
- hot glue gun
- scissors
Directions:

I chose to repurpose a flower pot from another project my daughter made. To begin, I painted the outside of the pot white. Unfortunately, she had used glitter in her paint so it didn’t cover smoothly. Oh well. I should have sanded it off first.
Using the white cardstock and pink craft foam I cut out ears and a nose for the bunny. I didn’t have white craft foam so I used white cardstock which I really liked in the end because I could curl the ears.
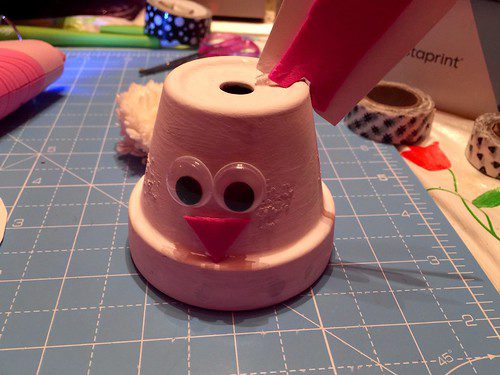
Using hot glue, attach all the parts as you desire. I began with the ears on the back of the pot but I didn’t like the look so I removed them, cut a notch into each ear, and then glued it to the edge of the top of the pot.

I used white cotton yarn to make a small pom pom for the tail. You could use a bought pom pom or even a cotton ball.

finished!