Making Metal Earrings

See how 3 different pairs of earrings were made using K&S Precision Metal.

With K&S Metals

heart earrings

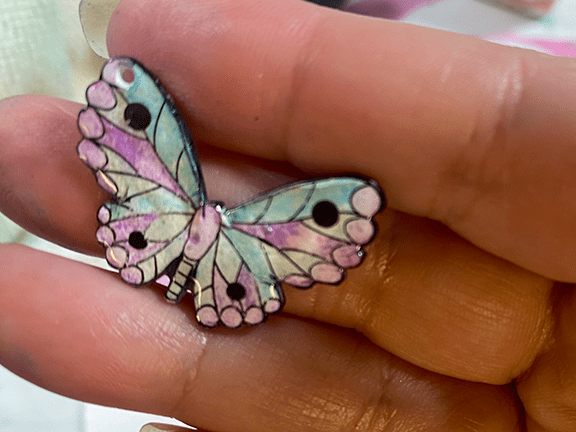
Whenever I am introduced to a new to me material, my first thought is, “can I make jewelry with it”? So of course when I was sent metal from K&S, I knew I was going to attempt to make earrings. And it worked out really well. After making my first pair, I couldn’t stop. I had to try different techniques with the metal.

The links provided are for your use and may contain affiliate links.
They cost nothing for you to use.
Thank you in advance for supporting this site with its use.

metal rolls

K&S sent me 5 rolls of precision metal to work with in pink, gold, blue, purple, and green. The first pair of earrings I made was from the pink roll. Each roll of the metal is aluminum-based and .004″ Thick (36 Ga) x 12″ Wide x 24″ Long.

die cut

I chose to try die-cutting the metal. Earrings are small enough to use a small cutting machine and the mini Maker was just the perfect size. I cut the pink metal with the large heart twice and then flipped over the metal to cut the small heart out twice in silver.

earring parts

To make the earrings I added black cardboard to the metal die-cut hearts to add thickness and weight. After all the pieces of the hearts were glued together, I poked a hole through the layers with a t-pin. Please refer to the video tutorial for detailed instructions.

Video Tutorial:

silver and gold earrings

The next pair of earrings I made were silver and gold. For this pair, I began the same way with die-cutting. I used a decorative circle shape in two different sizes and then folded the circles in half, and placed them on top of each other. No glue was needed.

star earrings

The final pair of earrings I made incorporated die-cut faux leather circles upon which I added die-cut metal stars. Before adding the stars, I ran the foil through my machine in an embossing folder and then filled the tops of the embossed dots with a nail file to remove the blue color so the silver could show through. The stars were then glued to the faux leather.

I would like to thank K&S Precision Metals for providing me with the metal to work with and Bella Publishing for the invitation. Designer Crafts Connection will share links to all the projects made for this blog hop.

Suggested Materials:

Links are Affiliates
AZ – Amazon, SSS – Simon Says Stamps, O – Other
Craft Foam
Craft Foam
Shop at:
O
Jewelry Tool Kit
Jewelry Tool Kit
Shop at:
AZ
K&S Metal
K&S Metal
Shop at:
AZ
Mini Maker
Mini Maker
Shop at:
O
Scotch Tacky Glue
Scotch Tacky Glue
Shop at:
AZ | SSS

DIY Butterfly Earrings

Learn how to make butterfly earrings with shrink film and UV Resin.

final earrings

I was so happy with the result of these DIY Butterfly Earrings. When my daughters saw them they requested pairs be made for them too, so I knew I had stumbled upon something good.

stamped image

I began with a stamped image on Grafix shrink art film in white. StazOn ink is great for this process because it is made for every surface and stamps a rich dark black.

cut out film

After stamping the image and allowing the ink to dry, I cut out the butterflies with a small detail scissor.

colored in

Coloring the butterfly with water-based markers was a bit of a challenge on plastic but I have a few tips in the video tutorial to make it work.

size difference

See the size difference between the stamped image and after the film has been shrunk. I used a heat gun to shrink the film, a dedicated toaster oven also works well.

I colored the edge and the back of the butterfly with a permanent black marker. Then I coated the back with matte UV resin and the front with jewelry resin both from You-V. The cool thing about You-V resin is that it is a quick cure resin, less than a minute under a UV flashlight.

You can see the gloss of the resin on the butterfly now. Drilling a hole into the top of the wing prepares the piece for the jewelry findings.

Video Tutorial:

Suggested Materials:

Links are Affiliates
AZ – Amazon, SSS – Simon Says Stamps, SB – Scrapbook, O – Other
Grafix Shrink Film
Grafix Shrink Film
Shop at:
AZ
Jewelry Tool Kit
Jewelry Tool Kit
Shop at:
AZ
StazOn
StazOn
Shop at:
AZ | SSS | SB
WRMK - All-In-One Tool - The Works
WRMK – All-In-One Tool – The Works
Shop at:
AZ | SSS | SB
You-V Resin
You-V Resin
Shop at:
O

How to Make Button Earrings

How to make fun button earrings.

button earrings

Making your own button earrings is a fun way to make earrings for a special outfit or event. I made these for my daughters for a recent trip to Disney. They are easy to make and cost-effective. Button earrings also make a great gift.

materials

The links provided are for your use and may contain affiliate links.
They cost nothing for you to use.
Thank you in advance for supporting this site with its use.

Materials:

  • Wire nippers
  • adhesive
  • buttons (mine were found at Walmart)
  • earring findings
  • sanding block or nail file

The materials needed are rather simple and you can use a variety of options. For cutting the backs off the buttons I used wire nippers but utility scissors can also work well. If you have a Dremel, that would do the trick. For the adhesive, I used Super Glue Gel. E6000 or a jewelry-making adhesive will also work. To sand the backs a nail file, sanding block, sandpaper, or a Dremel can file down any rough edges. The video tutorial below will show you the simple process.

Video Tutorial:

Being worn at the most happiest place on earth!

Making Jewelry with Felt

Make jewelry with felt beads made from Kunin Felt.

with Kunin Felt

It is time to start your holiday crafting and these pieces of felt jewelry would be perfect for gift giving. Each piece is made with a felt bead. This post will show you the different ways to make felt beads. The pieces above use a spiral bead technique.

I would like to thank Designer Crafts Connection for the opportunity to work with amazing companies and designers. And specifically for this post, I would like to thank Kunin Felt for providing materials used with this project.

Kunin Felt’s manufactured in the US from recycled plastic bottles reclaimed from landfills. It takes 10 bottles to make a pound of fiber. Kunin Felt‘s sold at Michaels under the Creatology Brand, at JoAnn, Walmart, Hobby Lobby, Fabric.com, and Amazon.

Materials:

  • ruler
  • marker
  • felt
  • beads
  • jewelry findings and tools
  • sewing clips
  • scissors
  • Fabri-Tac

The image above shows a few different ways to roll into beads. The top bead looks similar to a rose and rolls up with small pieces of felt inserted. This bead is a good way to use up scraps. The other two are spirals using three and two different colors of felt.

Here is another way to use up scraps. This bead uses small pieces of felt stacked together and threaded onto a wire.

Video Tutorial:

hanging earrings

Look how nice these look. The staggered pieces add to the shape and interest of the earrings. I have worn these earrings and they are very comfortable and lightweight. Because the felt is so light, I suggest adding beads that have a bit of weight to them. (Oh my gosh, the second ear wire is missing some elements, I am going to have to change that out! I didn’t notice it until writing this post. And as I said, I have worn them out!)

How to Make Ribbon Earrings

You are going to love making these earrings from ribbon with Gwen Studios.

With Ribbon from Gwen Studios

ribbon earrings

Today I am back working with Gwen Studios ribbon as an application to be on their design team. We were asked to make jewelry or home decor and since I had already made a decor piece with ribbon, I chose to make earrings. These ribbon earrings use coordinating ribbons layered together. The fun thing about them is that you can make them at whatever length you want.

I would first like to thank Designer Crafts Connection for the opportunity to work with amazing companies and designers. Specifically for this post, I would like to thank Gwen Studios for providing me with an amazing box of materials to work with.

ribbon earring materials
materials

Materials:

Many of the items I use in my posts are provided by the manufacturers in order to promote their products.
A special thanks to those brands who sponsor this site.
.

  • ribbons – Gwen Studios
  • jewelry making pliers
  • jewelry findings – ear wires and ribbon ends
  • scissors
  • ruler
  • lighter
  • adhesive – optional

Gwen Studios products can be found at your local Walmart store.

Directions:

measure ribbon

To make the earrings, you want to measure and cut your ribbons into different lengths. Starting with the widest ribbon as the longest. Keep in mind most of the ribbons will be folded in half.

Video Tutorial:

I am a total fan of pink so they were the first pair of earrings I made. Gwen Studios has so many beautiful ribbons I couldn’t stop making only one pair.

Sublimation Earrings

Learn how to DIY your own sublimation earrings. #sponsored @artesprix @oliso

With Artesprix

Recently I was a guest designer at Artesprix. I really enjoyed the process of creating with Sublimation markers. When I saw sublimation earring blanks on Amazon I knew I needed to work with them. This is the first, but not the last, pair of earrings I will be making. I really like the idea of being able to make earrings in colors and designs to match my outfits. These sublimation earring blanks let me do just that. Follow along and learn how to make your own sublimation earrings.

Materials:

Many of the items I use in my posts are provided by the manufacturers in order to promote their products.
A special thanks to those brands who sponsor this site.

  • Artesprix markers
  • earring blanks
  • stamp
  • Artesprix stamp pad
  • Artesprix heat tape
  • Artesprix protective paper
  • Artesprix project mat
  • Oliso craft iron
  • pencil
  • scissors
  • rhinestones
  • super glue
  • permanent black marker

I chose to work with four of the markers included in the pastel marker set from Artesprix.

After the design is colored in, it is time to prepare the earrings for heat to transfer the design. Don’t forget to peel the protective layer from each side of the earrings before heating. A pin helped me easily remove the film.

It is really important to prepare the layers before applying heat. I have a project mat on my work surface, then a piece of protective paper. The blank with the design taped in place comes next with the colored paper on top. Then finally another piece of protective paper. Now you are ready to apply the heat. If using an iron, the heat tape is really important so the design doesn’t move around.

I added rhinestones to the center of the earrings and colored the edges with a permanent black marker to finish off the design.

Video Tutorial:

Suggested Materials:

Links are Affiliates
AZ – Amazon, O – Other
Westcott 14849 8
Westcott 14849 8″ Straight Titanium Bonded Non-Stick Scissors
Shop at:
AZ
Super Glue
Super Glue
Shop at:
AZ
Rhinestones
Rhinestones
Shop at:
AZ
Sublimation Earrings
Shop at:
AZ
Sublimation Ink Pad
Sublimation Ink Pad
Shop at:
AZ | O
Pastel Sublimation Markers
Shop at:
AZ | O
Protective Paper
Protective Paper
Shop at:
AZ | O
Heat Resistent Tape
Heat Resistent Tape
Shop at:
AZ | O
Art-c stamp
Art-c stamp
Shop at:
AZ
Oliso Mini Iron
Oliso Mini Iron
Shop at:
AZ

Tres Jolie Monthly Kit :: Necklace

Working with a kit from Tres Jolie, I made a chipboard gear necklace. I am a guest designer for the month of June. #sponsored

This month I am a guest designer at Tres Jolie Kits. I was sent the Cards, Tags, and More kit. The kit included chipboard gears. I used those to create this chipboard gear necklace.

I used a variety of metallic paints on the gears. To begin I painted one in brown/bronze and the other in silver.

The necklace would be fine in brown and silver but I tend to like a bit more color so I used a blotting technique on the silver painted gear. I also painted the backs of the gears so they would look finished.

After gluing the dried gear pieces together, I added a thin layer of UV Resin. The resin adds a finished glossy look to the piece as well as adding stability.

Wrapping craft wire around the end of my paintbrush made for a bail for the back of the gears.

I Super Glued the bail to the back of the gear pieces that were glued together. In the above photo you can see that back of the piece is painted.

All that is left to do is thread the cord and ribbon necklace through the bail. I toyed with the idea of making this into a pin or a necklace. Obviously I chose the necklace. Which do you think you would choose?

DIY a Dragonfly Pin

Make an adorable dragonfly pin with Denise Boddey Designs. @deniseboddeydesigns #sponsored @DecoArtAcrylicPaints

Follow along as I make this adorable Dragonfly Pin using a chipboard design piece from Denise Boddey Designs. This post is created as a part of the design team and some materials have been provided to use in this post. You can make your pin in different colors if you wish. Make one match a special outfit or for a special occasion. The Dragonfly Pin would also make a great gift or an embellishment for a card or mixed media project.

white paint

Since the chipboard is dark, I used white chalk paint to coat the dragonfly. I found it needed two coats to fully cover the piece. Now the colors will show up better.

paint colors

I used a variety of paint colors and applied them in a dabbing motion. You can see what I mean in the video tutorial below.

glittered

To enhance the wings, I painted the entire dragonfly with White Enchanted Shimmer and while still wet, I applied chunky glitter to the wings.

resin

To finish off the dragonfly, I used UV resin to seal the piece. If you don’t have UV resin you could use a variety of different sealers. Spray varnish coating or Diamond Glaze would work as alternatives.

Video Tutorial:

Suggested Materials:

Links are Affiliates
AZ – Amazon, O – Other
Denise Boddey
Denise Boddey
Shop at:
O
UV Resin
UV Resin
Shop at:
AZ
UV Light
UV Light
Shop at:
AZ
Chalk paint
Chalk paint
Shop at:
AZ
Salmon paint
Salmon paint
Shop at:
AZ

Making Silver and Gold Earrings

Make a pair of silver and gold earrings using materials from The Maker’s Movement. #sponsored @jointhemakersmovement

with The Makers Movement

I really enjoy making earrings. Some of the easiest earrings to make use a die to cut the shape. The silver and gold earrings above are made using a die and other materials from The Maker’s Movement. I like the combination of silver and gold especially when you can’t decide which color of metal works with your outfit the best. Or if you are going to wear different metals for other jewelry pieces, these earrings can pull it all together.

A special thanks to The Maker’s Movement for providing materials to use in this post.

die
earring parts
pliers

Materials:

  • Faux leather – silver and gold
  • Earring wires in silver
  • jump rings in silver
  • two jewelry pliers
  • Mini Maker die cutting machine
  • Mandorla dies

Video Tutorial:

finished

Making Mod Earrings

Diy your own mod earrings with Grafix shrink film.

If you haven’t figured it out by now, I enjoy making jewelry. Grafix Arts sent me a variety of different plastic products to work with. These mod earrings are using silver shrink film.

I remember working with shrink plastic as a child and my excitement is still the same today. Watching the plastic shrink always thrills me and I am happy with the smaller results!

Materials:

  • StazOn black in pad
  • stamp
  • stamp block
  • hole punch
  • Silver Shrink Film
  • toaster oven
  • jewelry making findings
  • scissors
  • corner rounder
  • UV resin
  • UV lamp

Directions:

I stamped the image onto the silver film with StazOn ink twice.

I had a few areas that didn’t stamp solidly. Using a cotton swab and the ink pad, I filled in those areas – it worked great!

I used a corner rounder punch on the cut out pieces so there wouldn’t be any sharp edges when wearing the earrings.

I then centered a hole punch at the top of each image.

The plastic is now ready to bake. I have a dedicated toaster oven for crafting. I placed them on parchment paper, cover them with another piece of parchment paper, and followed the package directions for baking.

The two shrunk pieces are covered with UV resin to add thickness and longevity to the earrings. Then I used a variety of materials to finish off the earrings: silver wire, jump rings, black beads, ear wires, and jewelry-making tools.

I found the resin actually started the ink to bleed so if I were to do it again, I would spray fix the stamped image before using the UV resin.

Suggested Materials:

Links are Affiliates
AZ – Amazon, SSS – Simon Says Stamps, SB – Scrapbook
Westcott 14849 8
Westcott 14849 8″ Straight Titanium Bonded Non-Stick Scissors
Shop at:
AZ
UV Resin
UV Resin
Shop at:
AZ
UV Light
UV Light
Shop at:
AZ
Jewelry Tool Kit
Jewelry Tool Kit
Shop at:
AZ
StazOn
StazOn
Shop at:
AZ | SSS | SB
Grafix Shrink Film
Grafix Shrink Film
Shop at:
AZ