DIY Filled Ornament Gift

Make your own diy filled ornament that is great for gift giving.

with Gwen Studios

ornament

Make a two-fold gift for holiday giving with this Christmas Ornament. It’s an ornament to hang on your tree and you fill it with a special treat. Anyone would love to receive this special gift. All the beautiful ribbons are from Gwen Studios and can be easily found at your local Walmart store.

Many of the items I use in posts are provided by the manufacturers to promote their products.
A special thanks to those brands who sponsor this site
Some links are affiliates, thank you for using them.

Materials:

  • scissors
  • cardstock
  • Zyron sticker maker
  • Ribbons from Gwen Studios
  • clear ornament
  • Christmas medallion

This Christmas Tree ribbon is amazing, I have never seen anything like it. Gwen Studios has a variety of different patterns of die-cut ribbon available. It is cut really well but because of the small pieces, you may need to remove some from the design to gain the full effect.

photo credit: J. McGuffee

Check out the display of Gwen Studios die-cut ribbons at Walmart. There are trees, snowflakes, gingerbread men, ornaments, deer, and more.

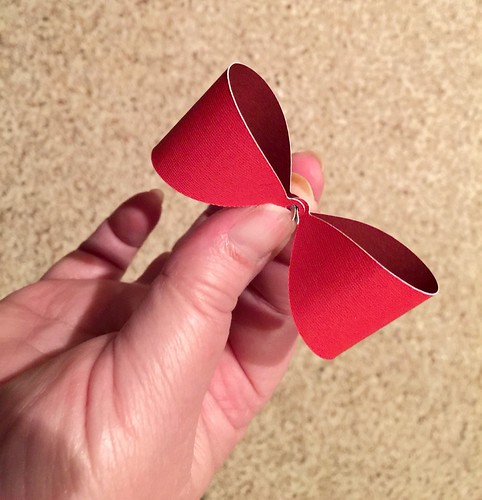
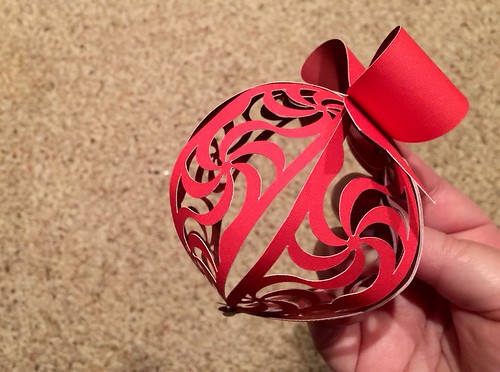
I ran both the tree and red ribbon through a Zyron sticker maker and stacked them together before I wrapped my ornament with them. Now I am adding the double bow and Christmas medallion to the ornament with a bit of Fabri-Tac glue.

Don’t forget to fill the ornament and attach the gift tag that coordinates. I filled mine with candies but bath salts or hot cocoa would be nice as well. Just personalize the filling to your recipient.

The complete video tutorial can be viewed below:

Video Tutorial:

The filled and finished ornament is ready to gift. It would be great to make a few of these to have on hand for last-minute gift-giving.

christmas inchies

And if you would like the printable to make the Christmas embellishment, you can find the inchies printable here: [Christmas inchies]

Suggested Materials:

Links are Affiliates
AZ – Amazon, SSS – Simon Says Stamps, SB – Scrapbook, O – Other
Fabri-tac
Fabri-tac
Shop at:
AZ
Westcott 14849 8
Westcott 14849 8″ Straight Titanium Bonded Non-Stick Scissors
Shop at:
AZ
Xyron Sticker Maker
Xyron Sticker Maker
Shop at:
AZ | SSS | SB
Gwen Studios at Walmart
Shop at:
O
Clear Ornament
Clear Ornament
Shop at:
O

How to Make Double-sided Paper

Learn the tips and tricks to making double-sided scrapbooking paper.

for Scrapbooking, Cardmaking, and Crafting

Double-sided paper packs are hard to locate. They are a preferred favorite of mine for paper crafting. I have begun making my own. I know you can glue two pieces of just about anything together, but getting the correct thickness is key for many applications. The secret I have learned that works best is to use wrapping paper.

Materials:

  • Single-sided Scrapbook paper
  • thin wrapping paper
  • spray adhesive
  • spray booth
  • scissors

The materials are simple and the process is easy. Spray the backs of each paper and then put them together before the adhesive has totally dried. Spray adhesive works best. Other kinds of adhesive will add bumps and bulk to the paper.

Video Tutorial:

My Spiral Ornament for the Cricut Ornament Exchange

I am participating in a Cricut Ornament Exchange. We were challenged to make a Christmas Ornament using our Cricut machine and then we sent them to another participant. I sent my ornament to Kara at Happy Go Lucky. The ornament I made is from an original design and the SVG file will be included below. The inspiration for this ornament was the red and white spiraled hard candies as well as candy canes.

Materials:

  • Doubled sided scrapbooking card stock
  • 2 brads
  • Personal cutting machine (I used a Cricut Explore Air 2)
  • SVG Spiral Ornament Pattern 

Directions:

The process for this ornament is more hands-on after the cutting of the design. When I cut out the design, I wasn’t getting through the card stock. I finally went to change the blade and found that my blade had some form of material stuck around it. Once this problem was resolved, the cutting was so easy. I really like using two-sided paper. I chose red which had burgundy on the other side. The only downside to using this kind of paper is the core of the paper is white and shows a bit on the edges of the paper. 

showing process
Design Space showing the progress of cutting the paper.

cut paper
The cut paper before weeding.

cut pieces
The cut shapes.

brads
The two brads, you can use any color.

curve paper
Take the bow shape, using your fingers, curve the bow shape.

bow
To begin you are going to stack the elements in order on the brad. Here is the bow we began to curve in the above image.

bow 2
Then add the ends of the ribbon to make the bow.

curl paper
Stacking all six similar pieces together, curve the paper by rolling it in your hand. This will help form the ornament in a later step.

add sides
Add the six pieces to the brad and then add the brad to the bottom. Make sure all pieces are facing the same direction if you are using a two-toned paper. Fan open the brads but not the full amount so there is some movement available.

start to seperate
Begin to seperate the ornament shape once piece of paper at a time.

finished
Now you can tighten up the brads by reaching into the ornament. You can manipulate the shape as needed even by pushed top and bottom towards each other until you are happy with the rounded shape.

I sent the file to my sister and that same night she went a bit crazy and made these two.

Take a peek at all the other entries:
An InLinkz Link-up

Homemade Sale – Cricut

Now through 5/19, Cricut is featuring 30% off select mats, Infusible Ink, and vinyl! In addition, snag an Explore Air 2 Machine, starting at $229!

Starting tomorrow through 5/26, Cricut is launching its Homemade Celebration, featuring 20% off all materials and accessories!

Cricut.com is offering Free Economy Shipping on orders $99+ with code SHIPMAY or MAYSHIP through 5/31.

These are affiliate links

Explore Air 2 Machines Starting at $229! Valid through 5/19

Save 30% off Select Mats! Valid through 5/19

Save 30% off Select Infusible Ink! Valid through 5/19

Save 30% off Select Vinyl! Valid through 5/19

Save 30% off Select Other Materials! Valid through 5/19

Save 50% off Rolling Totes! Valid through 5/19

Cricut Access Only: Save 40% off Select Iron-Ons! Valid through 5/19

Save 20% off All Materials! Valid through 5/26

Save 20% off All Accessories! Valid through 5/26

Winter Hat Christmas Ornament

Fun hat ornaments made from toilet paper rolls and yarn. Learn how to make your own.

These cute Winter Hat Ornaments are easy to make. They only take a few items that you probably already have at home and they are easy enough to make with children. Use one kind of yarn or a variety to create a striped hat. The options are really endless by using a variety of different yarns. This is a great craft to use up leftover project yarn.

materials

Materials:

  • yarn
  • scissors
  • tissue
  • toilet paper roll

Instructions:

toilet paper tube
Cut a 1/4 to 1/2 inch loop from the toilet paper roll. 

cut yarn
Cut lengths of yarn about 10″ long. I wrap around my thumb and pinkie fingers and then cut on of the loops.

loop through
Fold one piece of yarn in half. 
Place the loop through the tube. 

ends through
Put the ends of the yarn through the loop. 

pull tight
Pull the ends tight. 

full tube
Continue to do so until the tube is full of yarn. 

tie
Using one more strand of yarn, collect all the yarn ends and tie a double knot, very tightly. 

stuff tissue
Stuff a balled-up tissue into the hat to fill out the shape. 

trim
Trim the top “poof” of the hat and play with it to get the desired fullness. 

Enjoy!

Options:

  • You can use different colors of yarn to create a striped pattern if you desire.
  • Different yarns will create a different look, acrylic versus wool, etc…
  • You can use another piece of yarn to hang your ornament or insert a wire hanger into the top of the hat.
  • Instead of an ornament, use the hat to top off a bottle of wine.
  • Decorate a present using the hat like you would a bow.