This mixed media fall decor plaque was quick and easy to make. It has a little glam and a little bit of scary. Follow along with the tutorial to see what I mean. Special thanks to Denise Boddey Designs for providing the pumpkin cut out for this piece. As a part of the Denise Boddey design team, this is my October project.

Materials:
- yellow tissue paper
- foam dots
- wooden plaque
- pumpkin cut out
- paintbrush
- fall leaves
- ribbon bows
- matte Mod Podge
- white chalk paint
- salmon paint
- heat gun (optional)
Directions:


I began by using the chalk paint and doing a stain or whitewash technique on the plaque so the grain would show through.
To apply the paint, I wiped it on with a dry baby wipe.


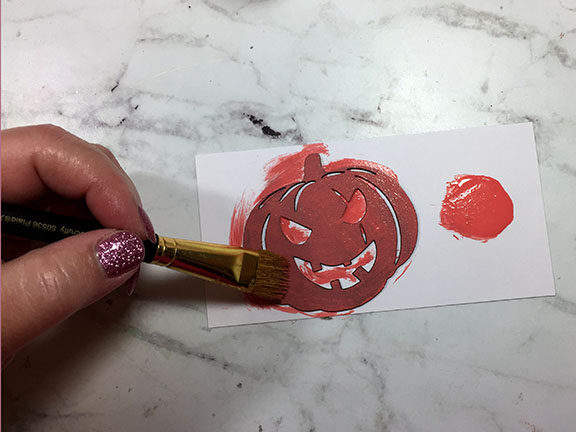
Setting the plaque aside to dry, I painted the pumpkin with salmon-colored paint.


Once those were dry, I decided upon the arrangement, and then began to Mod Podge everything in place.


I used a heat gun to speed up the drying process.
The leaves didn’t want to stick down but as the Mod Podge dried and I tapped on the leaves, they flattened and stuck.
The wood plaque showed where the Mod Podge was even though it was matte, so I covered the entire plaque.


Using a piece of wrinkled yellow tissue paper, I Mod Podged it to the back of the pumpkin.


Using a bit of Fabri-tac, I placed the bows on the top of the plaque.


To adhere the pumpkin to the plaque, I wanted it raised so I used a stack of two pop dots.


Once the plaque was done, I had another thought. What about having the face of the pumpkin glow in the dark!
I painted the tissue to glow in the dark. I really wish I had thought of this earlier, it would have been easier to do!


Glow in the dark is hard to photograph but I think you can get the gist of it here.
This added the scary feature to the plaque that isn’t really expected in the light.


Here is a quick tip for hanging.
Use a soda can tab as the hanger, just glue it to the back of the plaque.


And it is finished and ready to hang for fall!
Suggested Materials:
Links are Affiliates AZ – Amazon, SB – Scrapbook,


