Freebie Friday – Bunny Clip-Art

This week’s Freebie is a set of bunny clip art just in time for Easter crafting. Let me know how you plan to use them in the comment section. These bunnies are on one 8.5″ x 11″ PDF but you can change the size of them in your printer’s dialog box.

Grab the free printable PDF file here: [Bunny Clip-art]

My favorite printer brand for many years has been HP. I also use their ink supply service where I pay a monthly fee and they send me ink cartridges as needed. It comes out to be a lot less money this way. The HP Envy Inspire is a great-priced machine that will produce beautiful prints.

This image has an empty alt attribute; its file name is 71+gWCPnMHL._AC_SL1500_.jpg

And if you are looking for a great crafting weight paper for printables, I have been using HP Project Paper. It is heavier than copier paper but not quite as heavy as cardstock. It is a great medium weight for layering, folding, and more!

DIY Easter Bunny Decor

This Easter Bunny Decor is a Dollar Tree craft project.

final bunny

This project turned out better than I envisioned. The Easter Bunny Decor is made from a foam shape, napkins, and ribbons that I purchased at the Dollar Tree. It was a fun decoupage process. My youngest daughter loves bunnies and claimed this as her own.

materials

Materials:

  • foam shape
  • napkins
  • modpodge
  • foam brush
  • ribbons
  • fabri-tac

All these materials can be found at the Dollar Tree except for the Fabri-tac glue.

Video Tutorial:

back view of bunny

Above is the back view of the bunny. Pink flowers on the napkin are so bright and perfect for spring. The green leaves were added over the first layer of napkins. This added activity and visual direction to the final piece. In total, it took two napkins to cover the bunny because I needed to grab a few more green leaves.

Make a Terra Cotta Bunny Rabbit

You can easily make this terra cotta bunny rabbit. Why not include the kids?

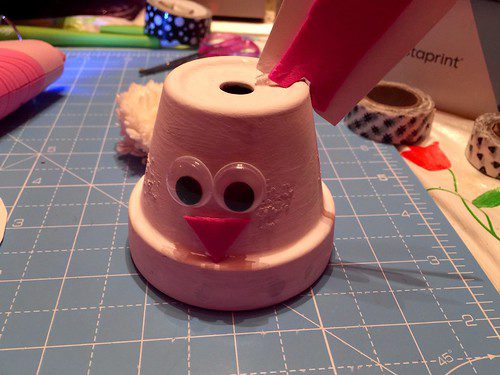
With Easter right around the corner, I chose to turn a cute little flower pot into a Bunny Rabbit. The steps were easy and very doable for children. But I think parents would need to help with the hot glue. While my design is minimal, you could definitely add to the bunny with whiskers, ribbon, flowers, and more. 

Materials:

  • small terracotta pot
  • cotton pom pom (or cotton ball)
  • pink craft foam
  • white cardstock
  • googly eyes
  • white paint
  • paint brush
  • hot glue gun
  • scissors

Directions:

I chose to repurpose a flower pot from another project my daughter made. To begin, I painted the outside of the pot white. Unfortunately, she had used glitter in her paint so it didn’t cover smoothly. Oh well. I should have sanded it off first.

Using the white cardstock and pink craft foam I cut out ears and a nose for the bunny. I didn’t have white craft foam so I used white cardstock which I really liked in the end because I could curl the ears. 

Using hot glue, attach all the parts as you desire. I began with the ears on the back of the pot but I didn’t like the look so I removed them, cut a notch into each ear, and then glued it to the edge of the top of the pot. 

I used white cotton yarn to make a small pom pom for the tail. You could use a bought pom pom or even a cotton ball. 

finished!