DIY a Night Light with Vinyl

How I updated a night light from the Dollar Tree with a vinyl design. @OfficalCricut @DollarTree #affiliate

A Dollar Tree Craft

I found this plain night light at the Dollar Tree and I was drawn to it for a crafting project. As a craft designer, I always have my eye out for project ideas and the Dollar Tree is a great place to find economical items. With the use of my Cricut and a little bit of vinyl, I transformed this plain night light into something more decorative. Follow along for this quick and easy project.

Many of the items I use in my posts are provided by the manufacturers in order to promote their products.
I want to give special thanks to those brands who sponsor this site.

materials

Materials:

  • night light
  • Cricut Maker
  • Holographic Vinyl
  • transfer tape
  • Cricut design
  • scissors
  • washi tape (optional)
Cricut Maker

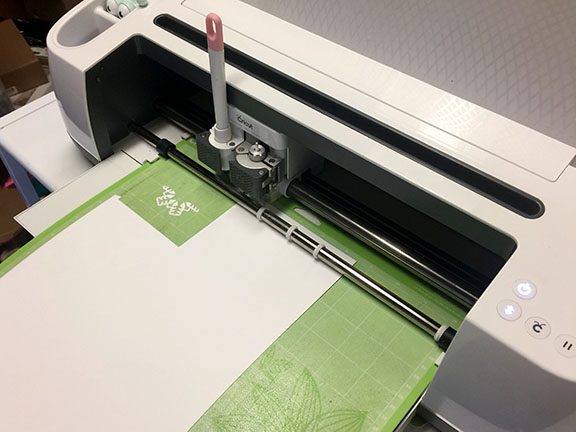
I cut the stencil design on my Cricut Maker using holographic Cricut vinyl. The design I used is a purchased Cricut design – Flower Square Coaster #MCDABE4D. I sized it to be a bit smaller than the flat surface of the night light.

I used washi tape for additional security on my mats since they aren’t as sticky as they used to be. This is just a precaution and not necessary for most.

For the next step, weed away all the unwanted vinyl and then apply your transfer tape. The video below will show you how these preparation steps were done.

Video Tutorial:

The finished night light is placed in our downstairs bathroom which is very dark. It stays lit all the time and sets off a beautiful soft blue glow that works really well with the holographic blue vinyl. I am happy with the result and I think the design really adds to the night light.

Suggested Materials:

Links are Affiliates
AZ – Amazon, C – Cricut, O – Other
Cricut Maker® Machine
Shop at:
AZ | O | C
Westcott 14849 8
Westcott 14849 8″ Straight Titanium Bonded Non-Stick Scissors
Shop at:
AZ
Cricut Standard Grip Mat
Shop at:
AZ | C
Cricut Vinyl
Cricut Vinyl
Shop at:
AZ | C

Working with Artesprix Sublimation Products

Unboxing Artesprix product for a future post and a quick bookmark tutorial. #sponsored @artesprix #affiliate

I was invited to be a guest design team member with Artesprix. Today I am sharing an unboxing of the materials they sent and a quick tutorial. I will be sharing a post on the Artesprix blog later this summer creating a tag project.

Artesprix makes sublimation markers and blanks. Blanks are specially treated products that accept the sublimation ink. Think of how fun it would be to personalize different products for gift giving. What a fun way to memorialize a child’s artwork or a special occasion.

parts: bookmark, marker, doodles

A while back, I attended a trade show where I was given a sample project from Artesprix, a sublimation marker, and a bookmark. I will be using that today in this post. I think this bookmark project would be a really fun activity for a book club to create.

One of the best things I found about working with Artesprix is that you create on regular copy paper. Once you like what you have created, you transfer that image to the blank/product. This allows you to perfect your drawing before committing it to a finished product.

finished bookmark

This bookmark project was quick and easy. Although not perfect due to some movement (user error) that caused shadowing of the image, I am really happy with the end result and I actually like the shadowing effect. I wish it was over the entire bookmark instead of just the bottom half. And of course, pink is a really nice color!

How to Etch Ceramics

I etched a ceramic box using Etchall cream. #sponsored @Etchall @CricutMade

Etching cream is usually used on glass surfaces but did you know you can also etch ceramic surfaces? Etchall works great on glass, ceramic, and slate surfaces. One of the best things about Etchall cream is that it is reusable, so a bottle is going to last a long time.

___________________________________________________________________
Some items used in this post were provided by the manufactures.
___________________________________________________________________

Materials:

  • ceramic piece
  • Cricut Joy
  • Etchall
  • design
  • vinyl
  • transfer paper
  • weeding tool
  • duct tape
  • popsicle stick
  • paper towel
  • baby wipe
  • cotton swabs
  • colored wax
  • rubbing alcohol

Directions:

Cricut Joy

I cut out a design using my Cricut Joy. The design I chose was one from Cricut (Geometric Tile Stencil #M1903D815).

I then weeded away the areas of the design I wanted to etch. Next, cover the design with transfer tape.

Follow the rest of the tutorial in the video below:

Video Tutorial:

Suggested Materials:

Links are Affiliates
AZ – Amazon, O – Other, C – Cricut
Cricut Joy
Cricut Joy
Shop at:
AZ | O | C
Etchall
Etchall
Shop at:
AZ | O
Duck Tape
Duck Tape
Shop at:
AZ
Rub On Metallic Colors
Shop at:
AZ

Making a Notepad Cover with a Napkin

Learn how to use a napkin to cover a notepad.

This colorful notepad is covered with a napkin. Learn how to easily use a napkin and Xyron to make a cover. Covered notepads make a quick and easy gift. Make a few of them to have on hand. These bright colors will give a special someone a lift.

Materials:

  • notepad
  • napkin
  • Xyron
  • scissors
  • cardstock
  • ribbon
  • adhesive

Video Instruction:

finished!

Making a Mini Christmas Card

Grab this free SVG file and make a cut mini Christmas Card for gift giving.

What a fun little Christmas card. It is a perfect paring for gift giving. While small, since it is an SVG file you can enlarge the card to your desired size. I cut mine on a Cricut Maker.

Materials:

  • card stock
  • paper
  • personal cutting machine
  • free SVG file
  • tape runner (or adhesive)
  • bone folder (optional)
Cutting on the Cricut Maker

Special thanks to Scrapbook Adhesives and Cricut for providing materials that were used to make this mini card.

Download the free file from the link above. Before cutting make sure to set all red lines to score. The other shapes will cut.

Video Tutorial:

inside of card close-up
outside of card close-up

Suggested Materials:

Links are Affiliates
AZ – Amazon, SSS – Simon Says Stamps, SB – Scrapbook, O – Other, C – Cricut
Cricut Maker® Machine
Shop at:
AZ | O | C
Intense Black Ink Pad
Shop at:
SSS
Tape Runner
Tape Runner
Shop at:
AZ | SSS | SB

Snowflake Place Cards

Making beautiful place cards with Cut Cardstock linen card stock.

As a part of the CutCardStock design team, I am sharing a free SVG file to make these beautiful snowflake place cards.

Visit the CutCardStock blog to see all the fun and creative posts made with cardstock.

Cutting Tip: To cut the card stock on the Cricut Maker, use the 100-pound card stock setting and adjust the cut to more. Then cut the card stock twice. After the first cut and before removing the mat, hit the Cricut cut button again.

The place card free SVG file shown above can be downloaded here:

DIY Color Experiment

A color experiment using Kool-Aid. Can we craft with it? It ends up being spritzed and painted with.

I recently saw a YouTuber use Kool-Aid to dye paper. I thought the Kool-Aid looked similar to shimmer powder. I also thought instead of staining the paper with kool-aid we could just paint with it. So the experiment began by going to the grocery store and seeing what colors I could find. I basically bought yellow, red, blue, and purple. Each package was about twenty-five cents. So home I went to try out our Kool-Aid colors.

Materials:

  • Kool-aid
  • paper
  • water brush
  • plastic containers
  • spritz bottle with water
  • Eye shadow
  • Deco-foil

Video Experiment:

spritz and paint sample page
shimmer trials
card parts

I decided the true test would be if you could use the kool-aid colors in crafting. So I made a few card fronts with the kool-aid colors. The version above has all the kool-aid colors and gold foil. A sentiment was stamped onto the bottom with coordinating purple ink.

xyron sticker maker

I used a Xyron sticker maker to apply adhesive to the back of the card front and then adhered it to the front of the folded card base.

finished red

And here is the red version. I added a Rinea foil sentiment and a diy flower from another tutorial here on Try it – Like it – Create it. Here’s the link to the flowers if you want to see how to make them: flower embellishments.