with Gwen Studios

I enjoy crafting for the holidays. I recently made these napkin rings for our Thanksgiving meal, however, they are adjustable and can be used for Christmas as well. The tutorial below will show you step by step how easy they are to make using Gwen Studios ribbons.
The links provided are for your use and may contain affiliate links.
They cost nothing for you to use.
Thank you in advance for supporting this site with its use.

This project was created for Gwen Studios. You can find all the design team projects listed on the Designer Crafts Connection website. Gwen Studios products can be found at Walmart and Michaels.

The core of the napkin rings is a toilet paper roll. Divide the roll in half and then each side in half again. This will give you four rings from one roll.

I am using Gwen Studios ribbons in brown, red, and sheer white. I also added a satin brown ribbon that was used to line the inside of the napkin rings but isn’t shown in the photo above.

Wrap the large brown ribbon around the cut toilet paper roll and adhere with Fabri-Tac. Fold the end under for a clean edge. Where the ribbon extends beyond the ring, add Fabri-Tac and fold the ribbon to the inside of the roll.

I found using clips to hold the ribbon folds made the process move along quickly. It only took a few minutes for the adhesive to grab. Using the clips allowed me to move on to the next ring.

Because the sheer ribbon will show the adhesive, I used a small thin line of Fabri-Tac down the middle of the ring. Start the next ribbon at the same starting point as the brown ribbon. Again, fold under the end of the ribbon.
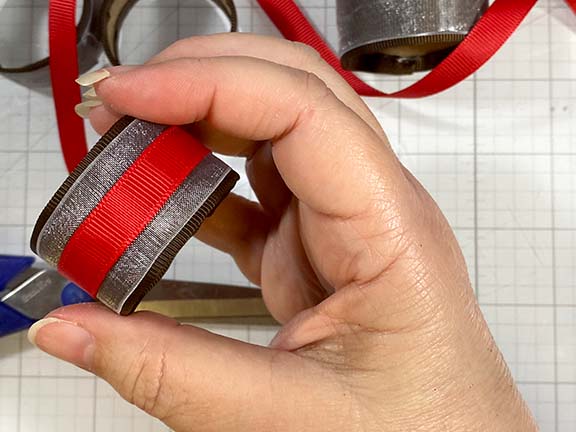
For the final red ribbon, start at the same point as the other two ribbons, using Fabri-Tac, cover the line of adhesive that is showing through the sheer ribbon, placing the red ribbon in the middle of the napkin ring. Fold under the end for a professional-looking finish.

Using a leaf sticker from Dollar Tree, I covered the folded ends of the ribbon. These leaves added a festive look to the napkin rings for Thanksgiving. The stickers are not permanent and can be replaced with sticker images from different holidays. For a more elegant look, don’t add a sticker.

While it isn’t totally necessary, using the same technique, I chose to add a satin ribbon to the inside of the napkin rings to finish them off.