


I was so happy with the result of these DIY Butterfly Earrings. When my daughters saw them they requested pairs be made for them too, so I knew I had stumbled upon something good.

I began with a stamped image on Grafix shrink art film in white. StazOn ink is great for this process because it is made for every surface and stamps a rich dark black.

After stamping the image and allowing the ink to dry, I cut out the butterflies with a small detail scissor.

Coloring the butterfly with water-based markers was a bit of a challenge on plastic but I have a few tips in the video tutorial to make it work.

See the size difference between the stamped image and after the film has been shrunk. I used a heat gun to shrink the film, a dedicated toaster oven also works well.
I colored the edge and the back of the butterfly with a permanent black marker. Then I coated the back with matte UV resin and the front with jewelry resin both from You-V. The cool thing about You-V resin is that it is a quick cure resin, less than a minute under a UV flashlight.
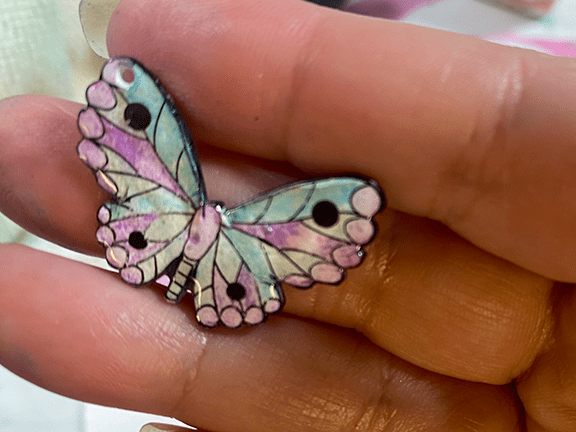
You can see the gloss of the resin on the butterfly now. Drilling a hole into the top of the wing prepares the piece for the jewelry findings.
Video Tutorial:
Suggested Materials:
 Grafix Shrink Film Shop at: AZ |
 Jewelry Tool Kit Shop at: AZ |
 StazOn Shop at: AZ | SSS | SB |
 WRMK – All-In-One Tool – The Works Shop at: AZ | SSS | SB |
 You-V Resin Shop at: O |