How to Collage a Tag

Tag it Tuesday

collage tag

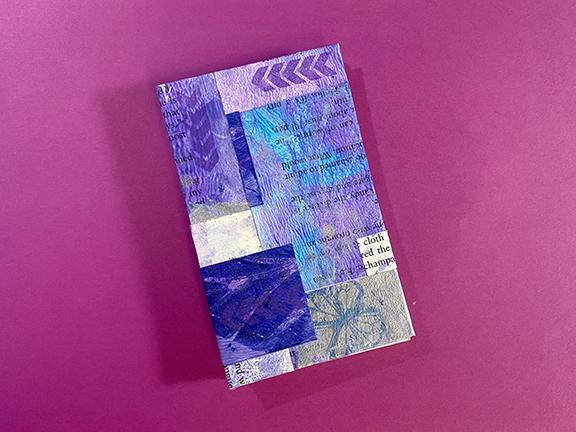
This collaged tag was really fun to make. I started with no real plan or vision for the outcome. Working with a variety of papers that coordinated colorwise and had a variety of different visual textures, I tore the pieces and began building the collage. The textures and colors are balanced intuitively and the finished image came together.

Video Tutorial:

The close-up images above show the detail of the collage papers, the die-cut word, the brown edges, and the gold paint splatters. I think the gold finished off the tag. There is a lot of visual interest happening in a rather small piece.

Suggested Materials:

Links are Affiliates
AZ – Amazon, SB – Scrapbook, O – Other
Die Cut Words
Die Cut Words
Shop at:
AZ
Finger Daubers
Finger Daubers
Shop at:
O
Glassboard discount code JANET20
Shop at:
AZ | O
Japanese Watercolor
Japanese Watercolor
Shop at:
AZ | O
Ranger Heat Tool
Ranger Heat Tool
Shop at:
AZ
Reptile Glue
Reptile Glue
Shop at:
AZ
Scrapbook Scissors
Scrapbook Scissors
Shop at:
SB
Stazon Chocolate Brown
Shop at:
AZ
Temu Glue Bottles
Temu Glue Bottles
Shop at:
O

Ephemera Paperclips

paper clips

I think I am addicted to making ephemera paper clips. It is so much fun using up scraps and pieces and combining them into a pleasant image. They are miniature works of art.

materials

There are no rules to making ephemera paper clips and if you do a Google search you will find a variety of examples. The only things you must use are a paper clip and some kind of adhesive. After that, you can collect whatever is around you. I tend to collect pieces that relate to each other by color.

Video Tutorial:

The first two I made were based on a journal I made in a past tutorial. I used leftover pieces of painted paper that were used for the cover of the book and coordinated additional pieces.

As I said, these were so fun to make. It has inspired me to do a series of miniature art pieces.

Bookmaking

Tab bookbinding with a collaged cover.

with Collaged Cover

front of book

A few years ago I attended a bookbinding retreat at Penland. To this day, I still rely on the techniques I learned. This sweet little journal has a tab binding. The nice thing about a tab binding is that you can make the book as many pages as desired. I began making the cover papers using book pages and collaged them together.

paint

You might be surprised to learn that I used children’s tempera and liquid watercolor. Applying the paints in a similar fashion to working on a Gelli plate. After the first layer of paint, different paint was applied with a stencil. Finally, stamped images were added.

collage

After the paint dried, I cut the pages into different sizes. They were then used to collage onto chipboard for the covers. The entire process from painting pages to bookbinding is better viewed in the video tutorial.

Video Tutorial:

binding
tab binding

Japanese Free Printable

Grab this free printable to try with your junk journaling, mixed media, and crafting.

japanese image
I have been working on a few new sets of digital prints to use for junk journaling, mixed media, and crafting. I wanted to give you a free file to try before you spend any money on the other sets that are available in the shop. Download the file, print it out, and see how it works for you. I’d love to see and hear about your experience. The file has two pages. The first page is the collaged image above, the second page is a solid red and white Japanese wave pattern to print on the reverse side of the collage.

The Japanese symbol on the left is Love. You might also recognize, koi fish, bamboo, Japanese kimono fabric, Mt. Fujiyama, and cherry tree blossoms.

You can access the free download in the shop here [Japanese free printable]

You might also like: