Card Making

Follow along the creative process for making a card, staring without a plan.

and the Creative Process

I began making this card without a plan. I take you through the entire creative process from start to finish using minimal materials. The process begins with ink smooching to make a background for the card. And from there, choose colors that coordinate.

For the sentiment, I used a word from the Word Art file located in the store. You can access that file here: https://tryit-likeit.com/product/word-art/

Many of the items I use in posts are provided by the manufacturers to promote their products.
A special thanks to those brands who sponsor this site. Some links are affiliates, thank you for using them.

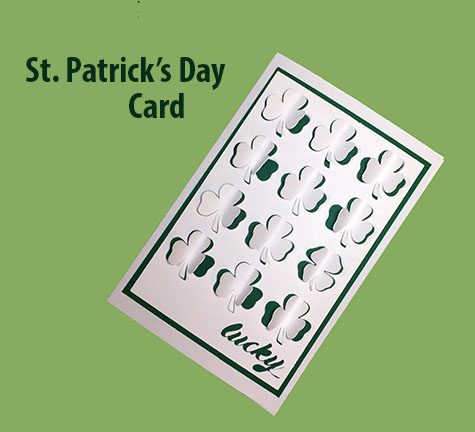
The sentiment is raised using foam tape and the bloom is tucked into the top. You also get a sense of the glitter splats from the Unicorn Spit paint.

Video Tutorial:

The image above shows the finished card and a peek to the inside. I like to take elements from the front of the card and carry them into the inside. You can also see the slight 3D effect of the bloom on the front of the card.

Suggested Materials:

Links are Affiliates
AZ – Amazon, SSS – Simon Says Stamps, SB – Scrapbook, C – Cricut, O – Other
Cricut Portable Trimmer
Shop at:
AZ | C
Gina K foam tape
Gina K foam tape
Shop at:
AZ | SSS | SB
Homeright Heat Gun
Homeright Heat Gun
Shop at:
AZ
Scraperfect 32 Clog Writing Cap, Medium
Shop at:
AZ | SSS | O
Scraperfect Best Glue Ever
Shop at:
AZ | SSS | O
Unicorn Spit
Unicorn Spit
Shop at:
AZ

Making a Card from Scraps

Make greeting cards using up your scraps can be an enjoyable creative process.

 Making a card doesn’t have to be difficult. Using up your scrap pieces can be an enjoyable creative process and useful too. I keep my little scraps in a basket on the side of my craft table and then put color coordinating pieces together.  When there are enough of them, I start to make cards with them.

Materials:

 I used cardstock and Rinea Foil but any paper will work. I didn’t cut down or adjust the pieces. I find it a fun creative process to work around these constraints and find a pleasing composition. 

 I color my own gem stickers to coordinate with the design. This tip is a great cost-saving. I didn’t add a sentiment to the card. This makes the design flexible for a variety of different uses and I can personalize it when it’s needed. 

If you would like to see how I created the foiled embellishment:   https://youtu.be/IZIdyWZ0BSc 

Video Tutorial:

  A close-up view. The card is a bit difficult to photograph but is beautiful in person.

Making a Fall Blessings Card

Make a fall greeting card with products from the Makers Movement.

with the Makers Movement

The Makers Movement sent me a recently released die set and card stock pack. The fall colors of the card stock were perfect for making a card. The leaves cut out in two different tones of green were placed in a circle to make a wreath. I really enjoy the fall colors in the card stock pack.

Many of the items I use in posts are provided by the manufacturers to promote their products.
A special thanks to those brands who sponsor this site
.

Materials:

  • card stock – white and patterned
  • Paper Trimmer
  • Rinea foiled paper
  • Let’s Get Cozy Die
  • CrossOver II
  • Mini Maker
  • washi tape punch
  • tape runner
  • adhesive
  • pencil
  • sentiment die

I chose to work with coordinating paper that included two shades of green to make the wreath. The curved leaf die was perfect for the circular shape of the wreath.

I began getting the parts needed together. Cutting the leaf shape on the CrossOver II. My favorite thing about the CrossOver II is the adjustable steel roller bar, which allows various thicknesses to cut easily. The sentiment was an afterthought so I cut it on the Mini Maker. Both machines are made by the Makers Movement.

To see the card being put together, watch the video tutorial below.

Video Tutorial:

Suggested Materials:

Links are Affiliates
AZ – Amazon, SSS – Simon Says Stamps, SB – Scrapbook, O – Other
Scraperfect Best Glue Ever
Shop at:
AZ | SSS | O
Scraperfect 32 Clog Writing Cap, Medium
Shop at:
AZ | SSS | O
We R Memory Keepers - All-In-One Tool - The Works
We R Memory Keepers – All-In-One Tool – The Works
Shop at:
AZ | SSS | SB
Rinea Foiled Paper - jade and gold
Rinea Foiled Paper – jade and gold
Shop at:
O
Crossover II
Crossover II
Shop at:
AZ
Maker's Movement
Maker’s Movement
Shop at:
O
Mini Maker
Mini Maker
Shop at:
O
Tape Runner
Tape Runner
Shop at:
AZ | SSS | SB
Washi Chomper
Washi Chomper
Shop at:
AZ | SSS | SB | O

Making a Card with Mica Powder

Make a mini mica card using up materials you have on hand.

I like making cards that are alternative sizes. This is a good technique for using up scraps and materials you already have on hand. I am using a lot of materials to make this simple card but you don’t have to have them all to make a similar card. Follow along with the video tutorial to see how this simple card is done.

Materials:

  • cardstock
  • stamp
  • stamp block
  • Versamark ink pad
  • Mica power
  • Label maker
  • alcohol ink marker
  • Washi chomper
  • Glue Dots

Video Tutorial:

Here is a close-up of the finished mini card. The mica powder really shines in person. I like how the colors are enhanced by the black cardstock.

Let me know what you make cards in a variety of different sizes. I think mini or small are my favorite.

Suggested Material Links:

Links are Affiliates
AZ – Amazon, SSS – Simon Says Stamps, SB – Scrapbook
Spectrum Noir Markers
Shop at:
AZ | SSS | SB
Versamark
Versamark
Shop at:
AZ | SSS | SB
Glue Dots
Glue Dots
Shop at:
AZ | SSS | SB
Similar Brother Label Maker
Shop at:
AZ
Washi Chomper
Washi Chomper
Shop at:
AZ | SSS | SB
Pearl-Ex
Pearl-Ex
Shop at:
AZ

How to Blend Ink

How to blend ink on a stamp.

I was recently asked to make a layered stamped card. Using a blended ink technique for the sentiment, I thought I would share my process here for how to blend the ink and then stamp it. I really like the subtle blend and it worked well as a background for my stamped sentiment. I am sure to use more ink blending in the future, how about you?

Materials:

  • stamping block
  • large flat stamp
  • water spray bottle
  • cotton swab
  • ink pads (I used 5)
  • card stock

Video Tutorial:

blended and stamped

You don’t have to spritz with water but I think it helped with the ink blending. And the cotton swab technique is a lifesaver, I am so glad I stumbled upon that technique!

Finally, I cut out a square shape from my stamped image and used it on the card at the top of the post.

Lucky Card and SVG

Make a lucky card for St. Patrick’s Day.

Do you celebrate St. Patrick’s Day or know some one Irish? Make this lucky card to send them a greeting. It is a quick card to make with a personal cutting machine. I really like the 3D aspect of the shamrocks (clovers), and there is one lucking one hiding among the others.

Some products used in this post were provided by the following companies: Cricut, CutCardStock, Scrapbook Adhesives

You’ll want to grab the SVG file to make the card and cut it out on your personal cutting machine. I used a Cricut Maker.

Purchase file: St. Patricks Day SVG

Materials:

  • SVG file linked above
  • Personal cutting machine (Cricut Maker)
  • white cardstock
  • green cardstock (CutCardstock)
  • tape runner or Adhesive (Scrapbook Adhesives)

Video Tutorial:

up close detail of the lifting shamrocks

Suggested Materials:

Links are Affiliates
AZ – Amazon, SSS – Simon Says Stamps, SB – Scrapbook, O – Other, C – Cricut
Cricut Maker® Machine
Shop at:
AZ | O | C
Cut Cardstock
Cut Cardstock
Shop at:
O
Cricut Standard Grip Mat
Shop at:
AZ | C
Tape Runner
Tape Runner
Shop at:
AZ | SSS | SB

Layered Greeting Card :: free SVG

Grab this free SVG file to create a layered greeting card. @scraperfect #sponsored

Today I have a post on ScraPerfect for this beautiful layered greeting card. I am sharing the free SVG file below but if you want to see the entire post and the video tutorial follow the link: [layered card]

Cricut Maker

I used a Cricut Maker to cut and score the card stock. Don’t forget to set the red line to score before cutting.

SVG image

The SVG file contains additional layers that weren’t used in this project. Feel free to use as many or as few of the layers as you desire. The additional layers are shown in blue and create a slight outline.

Suggested Materials:

Links are Affiliates
AZ – Amazon, SSS – Simon Says Stamps, O – Other, C – Cricut
Scraperfect Best Glue Ever
Shop at:
AZ | SSS
Scraperfect 32 Clog Writing Cap, Medium
Shop at:
AZ | SSS
Cricut Maker® Machine
Shop at:
AZ | O | C