Foil Technique and a Die

with Kokorosa

Finished card

This card can be used for so many different occasions. I am not sure which makes it more beautiful, the die or the foil technique. Together they are exquisite.

Kokorosa provided the Bubbles Background Board die for this post. If you would like to get the same die, here is a discount and link.

For a 25% discount use the code: L44991

Kokorosa: https://shrsl.com/4firh
Bubbles Background Board

Video Tutorial:

close-up

It is so interesting how the foil looks like it is on top of the die cut, doesn’t it? The close-up shows the colors reflecting well.

Suggested Materials:

Links are Affiliates
AZ – Amazon, SSS – Simon Says Stamps, SB – Scrapbook, O – Other
Aleene's Tacky Spray
Aleene’s Tacky Spray
Shop at:
AZ
Cricut Brayer
Cricut Brayer
Shop at:
AZ
Gemini Die Cut Machine
Shop at:
AZ
Glassboard discount code JANET20
Shop at:
AZ | O
Krylon Kamar Varnish
Shop at:
AZ
Non-Stick Scissors
Non-Stick Scissors
Shop at:
AZ
Ranger Heat Tool
Ranger Heat Tool
Shop at:
AZ
T-Rex Alcohol Inks
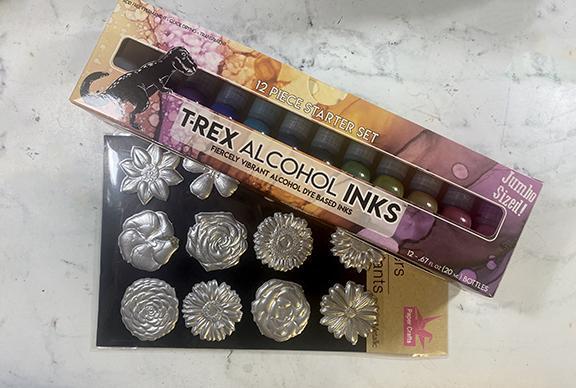
T-Rex Alcohol Inks
Shop at:
AZ
Tape Runner
Tape Runner
Shop at:
AZ | SSS | SB

Alcohol Ink Stickers

Trying alcohol ink on silver metallic looking stickers from the Dollar Tree.

finished stickers

Alcohol inks are very fun to create with. They interact with each other in interesting ways creating different results each time. They work on most non-porous surfaces so when I saw these metallic-looking stickers at the Dollar Tree, I knew I wanted to try alcohol ink on them.

materials

Metallic stickers come in silver, gold, and bronze colors. I chose the silver thinking it would work best with the inks.

in process coloring

First I tried dropping the ink onto the sticker, the next one I tried applying the ink with a cotton swab, and on the last sticker, I switched to acrylic paint markers. Each process gave a different result. The video tutorial below will take you through each process.

Video Tutorial:

I think the first and last version gave the best results. While the stickers appeared metallic in the package and once removed appeared more like plastic either surface should work. The alcohol ink didn’t work as well as I expected. The acrylic paint markers gave great coverage but lost the metallic quality of the original sticker. In summation, the plastic mailing envelope I used as a protective work surface actually had the best results from the alcohol ink being applied to it. So now I have another project to work on!

Fairy Stamping and Gelli Plate Tutorial

Making a fairy card with a Gelli Plate background. #sponsored #affiliate @fairystamper

I have a video tutorial up on the Fairy Stampers YouTube channel. As a part of their video design team, I post tutorials twice a month. Today I am using a Gelli Plate to make the background image along with the Moana stamp fairy. The Gelli Plate technique I am using is with alcohol inks and acrylic paint. It is really fun and addictive.

Many of the items I use in my posts are provided by the manufacturers in order to promote their products.
A special thanks to those brands who sponsor this site.

Materials:

  • Gelli Plate
  • Alcohol Inks
  • 2 brayers
  • copy paper
  • The Works Board
  • mini Maker die cutter
  • leaf die
  • card stock – green and white
  • blending brush
  • Distress Oxide stamp pads
  • Liquitex Acrylic
  • Best Glue Ever
  • tape runner
  • black ink pad
  • Derwent pencils
  • sentiment stamp
  • paintbrush

Video Tutorial:

I added details on the inside of the card as well. A strip of the Gelli Plate print that I had trimmed off the background and an additional die-cut leaf. These elements add a surprise when the card is open as well as linking to the front of the card.

Suggested Materials:

Links are Affiliates
AZ – Amazon, SSS – Simon Says Stamps, SB – Scrapbook, O – Other
Scraperfect Best Glue Ever
Shop at:
AZ | SSS | O
Scraperfect 32 Clog Writing Cap, Medium
Shop at:
AZ | SSS | O
Scraperfect Perfect Crafting Pouch
Shop at:
AZ | SSS
Ranger Adirondack Alcohol Ink 3 pack
Shop at:
AZ | SSS
We R Memory Keepers - All-In-One Tool - The Works
We R Memory Keepers – All-In-One Tool – The Works
Shop at:
AZ | SSS | SB
Professional Makeup Brush Set
Shop at:
AZ
Intense Black Ink Pad
Shop at:
SSS
Distress Ink Bundle
Distress Ink Bundle
Shop at:
AZ
Mini Maker
Mini Maker
Shop at:
O
Tape Runner
Tape Runner
Shop at:
AZ | SSS | SB
Gelli Plate
Gelli Plate
Shop at:
AZ | SSS
Liquitex Transparent White
Shop at:
AZ
Derwent Inktense
Derwent Inktense
Shop at:
AZ

How to Etch Celebratory Champagne Glasses

These basic champagne glasses from the Dollar Store were given an upgrade with Etchall Etching Cream and then decorated with Alcohol Inks. They make the perfect pair for celebrating a special occasion or for everyday use. You could change the color combination to suit your needs like school colors for a college graduation party, or for wedding colors. 

This post and photos contain affiliate links. If you purchase something through any link, I will receive a small commission at no extra charge to you.
Any supplies used may be given to me free of charge, however, all projects and opinions are my own.

Materials:

Directions:

To begin, remove any labels and clean the glasses using rubbing alcohol.

Then cover the desired area (the stem) with etchall Etching Creme, wait 15 minutes, remove excess back to the container, and then wash.

The etching is done.
The result is very elegant, and you could stop right here.


The alcohol inks I chose to use.


Turn the glass upside down.
Drop a small drop of ink at the stem of the glass and let it run down.
Continue until you like the look.


Here is an up-close look at the glass.
Notice I put a “ring” around the top of the stem in silver.


I purposely didn’t let the ink cover anywhere near the drinking lip of the glasses.
I covered them in a plastic bag and taped it in place.
Placing it in my spray box, I sprayed it with a sealer and let it dry.
(you may need a few light coats)


Remove the taped bag and your glasses are ready to celebrate with!

Recommended etchall Products
(affiliate links to Amazon)