Grab this free SVG file for the kitchen and wear it on an apron or make it as a sign. #freeSVG
This month the group of SVG blog hoppers are sharing posts with the theme kitchen signs. Now I know an apron really isn’t a kitchen sign but the SVG will work as a sign as well, don’t you think? Besides, I love this SVG on an apron, especially one a man is wearing!
Grab this free kitchen SVG file and make your own apron or sign or whatever your heart desires!
Making a simple greeting card to say hello. #sponsored @scraperfect
Today I have a post with a video tutorial up on the ScraPerfect blog. This greeting card was made with pieces cut on a Cricut Maker. Visit the link below to see the video tutorial.
Make a fun party hat for your celebration. @cutcardstock @cricutmade #sponsored
As a part of the Cut Cardstock design team, I have a post on their blog today making a star party hat. This hat file is very flexible. You can make it with the stars, or without. You can leave the star shapes open or layer tissue paper on the inside to color the stars.
Thanks to Cricut and Cut Cardstock for providing materials that were used in this post.
Check out this art crayon embossing techniques. @MarabuAmerica @jointhemakersmovement #sponsored
Using Marabu Art Crayons
I had so much fun with this color embossing technique, using Marabu Art Crayons and embossing plates. I love how the color moves when water is added. The results are playful and colorful and can be used so many different ways. I think the results would be great for card backgrounds, die-cutting, mixed media, collage, scrapbooking, and more.
Thank you to Marabu and Maker’s Movement for providing materials that were used in this post.
Wrapping a present for a birthday party, we needed a card. I had very little time before we needed to leave. After wrapping the present, I decided to use the wrapping paper to make a matching card. It was so quick and easy to do.
As a craft designer, I am provided materials to create with. Some items used in this post were provided by the manufactures.
Materials:
wrapping paper
stamp – Stampendous
the works board – We R Memory Keepers
ink pad – izink
cardstock
tape runner – Scrapbook Adhesives
*Note: single-sided wrapping paper works best so the design from the other side doesn’t show through like the example does.
Video Tutorial:
Suggested Materials:
Links are Affiliates AZ – Amazon, SSS – Simon Says Stamps, SB – Scrapbook
We R Memory Keepers – All-In-One Tool – The Works Shop at: AZ | SSS | SB
I etched a ceramic box using Etchall cream. #sponsored @Etchall @CricutMade
Etching cream is usually used on glass surfaces but did you know you can also etch ceramic surfaces? Etchall works great on glass, ceramic, and slate surfaces. One of the best things about Etchall cream is that it is reusable, so a bottle is going to last a long time.
___________________________________________________________________ Some items used in this post were provided by the manufactures. ___________________________________________________________________
Materials:
ceramic piece
Cricut Joy
Etchall
design
vinyl
transfer paper
weeding tool
duct tape
popsicle stick
paper towel
baby wipe
cotton swabs
colored wax
rubbing alcohol
Directions:
Cricut Joy
I cut out a design using my Cricut Joy. The design I chose was one from Cricut (Geometric Tile Stencil #M1903D815).
I then weeded away the areas of the design I wanted to etch. Next, cover the design with transfer tape.
Follow the rest of the tutorial in the video below:
Video Tutorial:
Suggested Materials:
Links are Affiliates AZ – Amazon, O – Other, C – Cricut
As a part of the ScraPerfect design team, I have a post on their blog today making this Easter egg tag. #sponsored @ScraPerfect
Today I have a post over on the ScraPerfect blog sharing how I made this Easter egg tag. It uses a fun washi tape technique with a die-cut. A video tutorial is also shared. [egg tag]
As a design team member, I am provided with materials to work with. Special thanks go to ScraPerfect and Makers Movement for products used in this project.
Hello Friend card for a video hop and giveaway sponsored by @crackerboxandsuzystamps. #sponsored #scrapbookadhesives
Video Hop and Giveaway
Today I have a video up on YouTube where I am participating in a video hop and giveaway that is sponsored by Crackerbox & Suzy Stamps. I was provided with stamps in order to participate in this hop.
To enter the giveaway, make sure to visit each video in the hop and leave a comment.
(P.S. Earn BONUS entries for each video on the hop that you comment on! Complete as many or as few of the Rafflecopter options as you choose; but the more you complete, the better your chances of winning!)
To see the amazing products offered by Crackerbox & Suzy Stamps, please visit their online store: http://rubberartstamps.com/ Once the giveaway is closed, the winner will be chosen at random and contacted by our sponsor.
If you are the winner, you will have one week (after contact) to claim your prize. Failure to do so will result in forfeiting the prize and an alternate winner will be chosen. Thanks for hopping along with us!
*This giveaway is gifted by Crackerbox & Suzy Stamps. YouTube is not responsible for prize fulfillment.
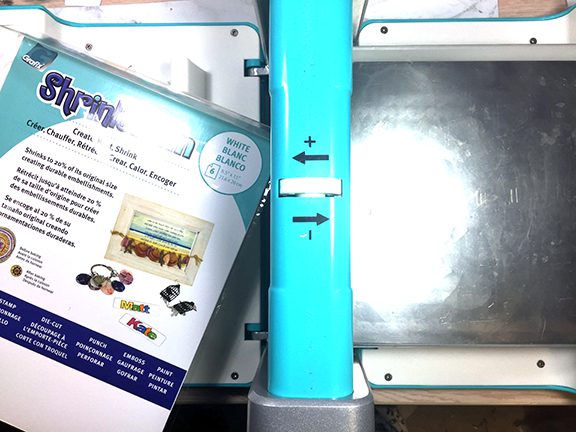
Can you stamp with a die? Check out how I made a shrink art keychain.
Maker’s Movement sent me the Nesting Doll die set. I decided I wanted to try something a little different with the dies. I wondered, can you actually stamp with a die? The answer is yes, well, kind of. Doing so leaves a light image but it is enough to work with and I make this sweet keychain using the technique.
Thank you to Maker’s Movement and Grafix for providing materials that are used in this project.
CrossOver II and Graphix shrink film
Materials:
CrossOver II
Nesting Doll Die Set
Grafix shrink film in white
Alcohol ink markers
Paint markers
Black thin line marker
stamp pad
washi tape
keychain element
jump ring
2 jewelry pliers
UV Resin
UV light
toaster oven
Directions:
Nesting Doll Die Set
To begin, I clipped the pieces of the die apart that I needed to work with. Then I cut out the doll shape from the Grafix shrink film.
Video Tutorial:
Look at the difference in size from the die (the original size) to the shrink film after baking. Not only did the size change but the colors got more intense.
Suggested Materials:
Links are Affiliates AZ – Amazon, SSS – Simon Says Stamps, SB – Scrapbook